

Quick Answer#
The GemIQ uses AI to automatically remove the background from your jewelry photos. You can create a transparent background or replace it with a new one from our library or your own uploads. This feature works best with images shot on a clean, white background.
Before You Start#
You need the GemIQ application installed on your device.
The image you want to edit should be a high-quality photo of a single jewelry item.
For best results, use a photo taken with a solid white background.
If you want to use a custom background, have the image file ready to upload.
Steps#
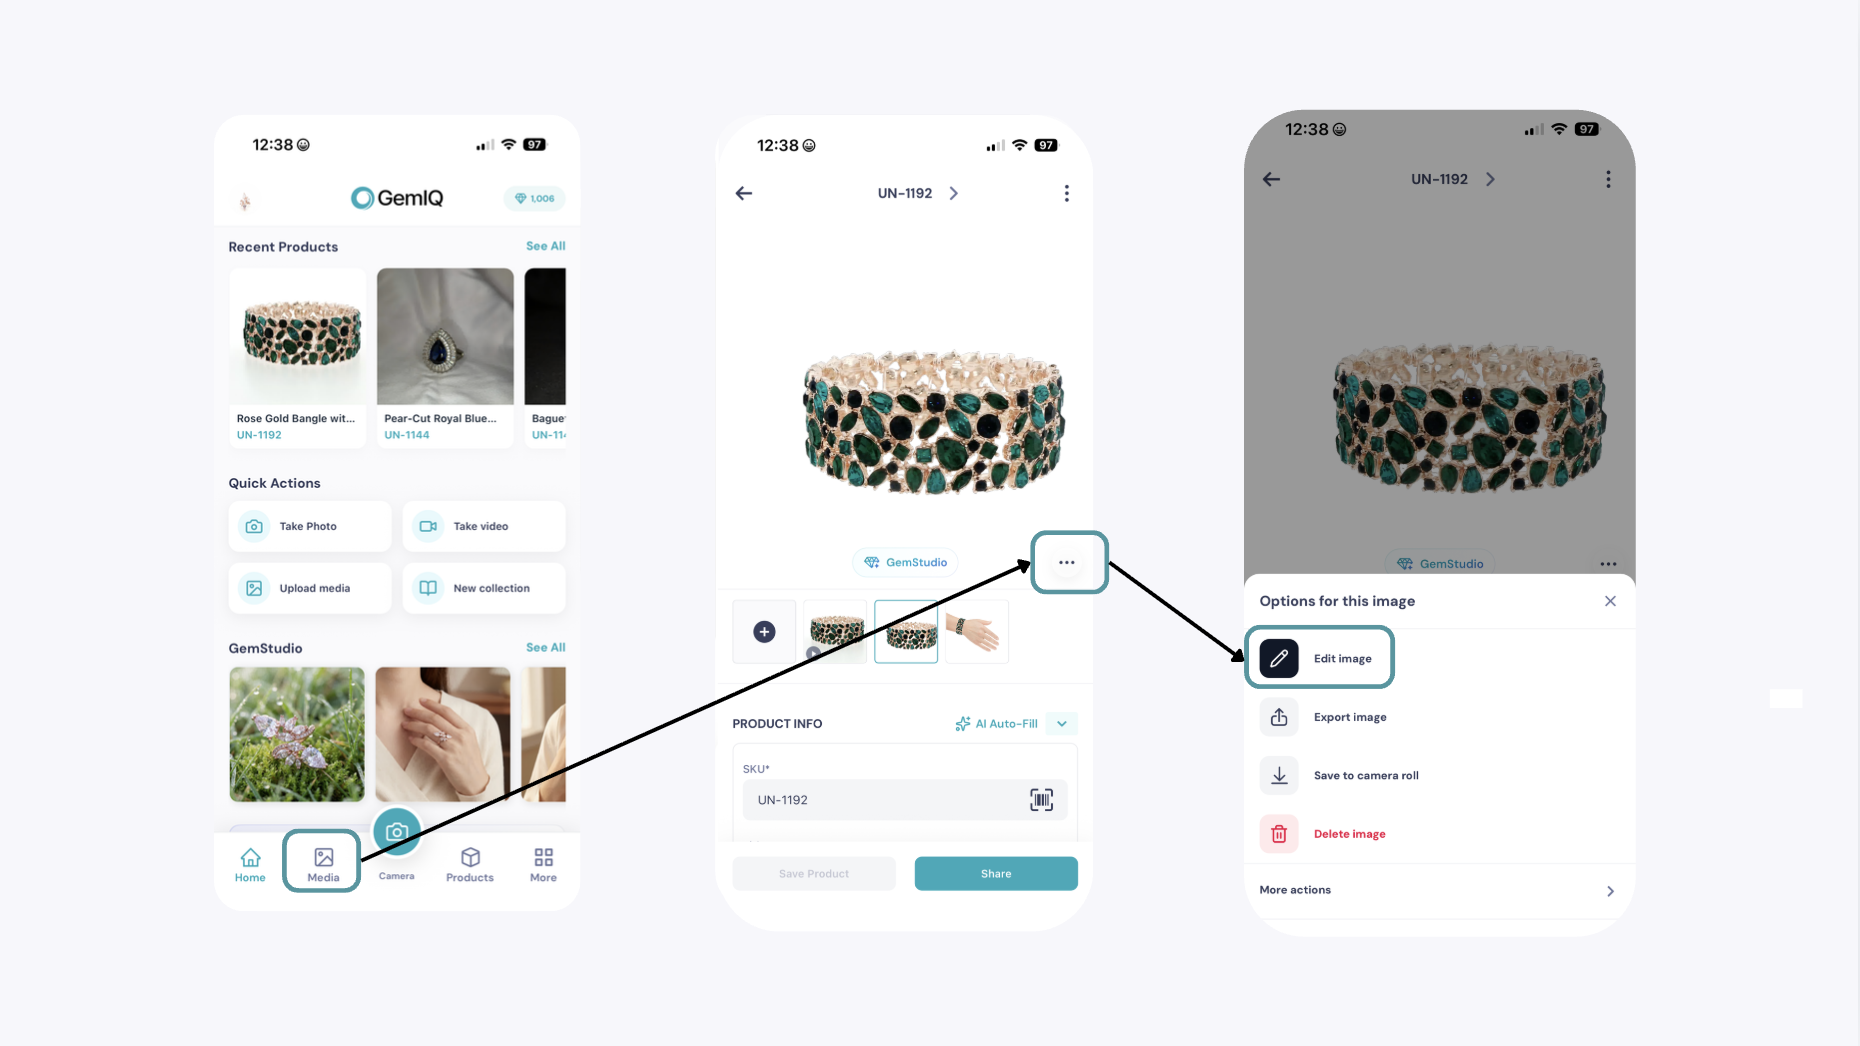
Open the GemIQ and navigate to your gallery.
Select the product you wish to edit, then tap on the image to open it.
Tap the pencil icon to enter Edit Mode.
In the editing panel, find and tap Remove Background.
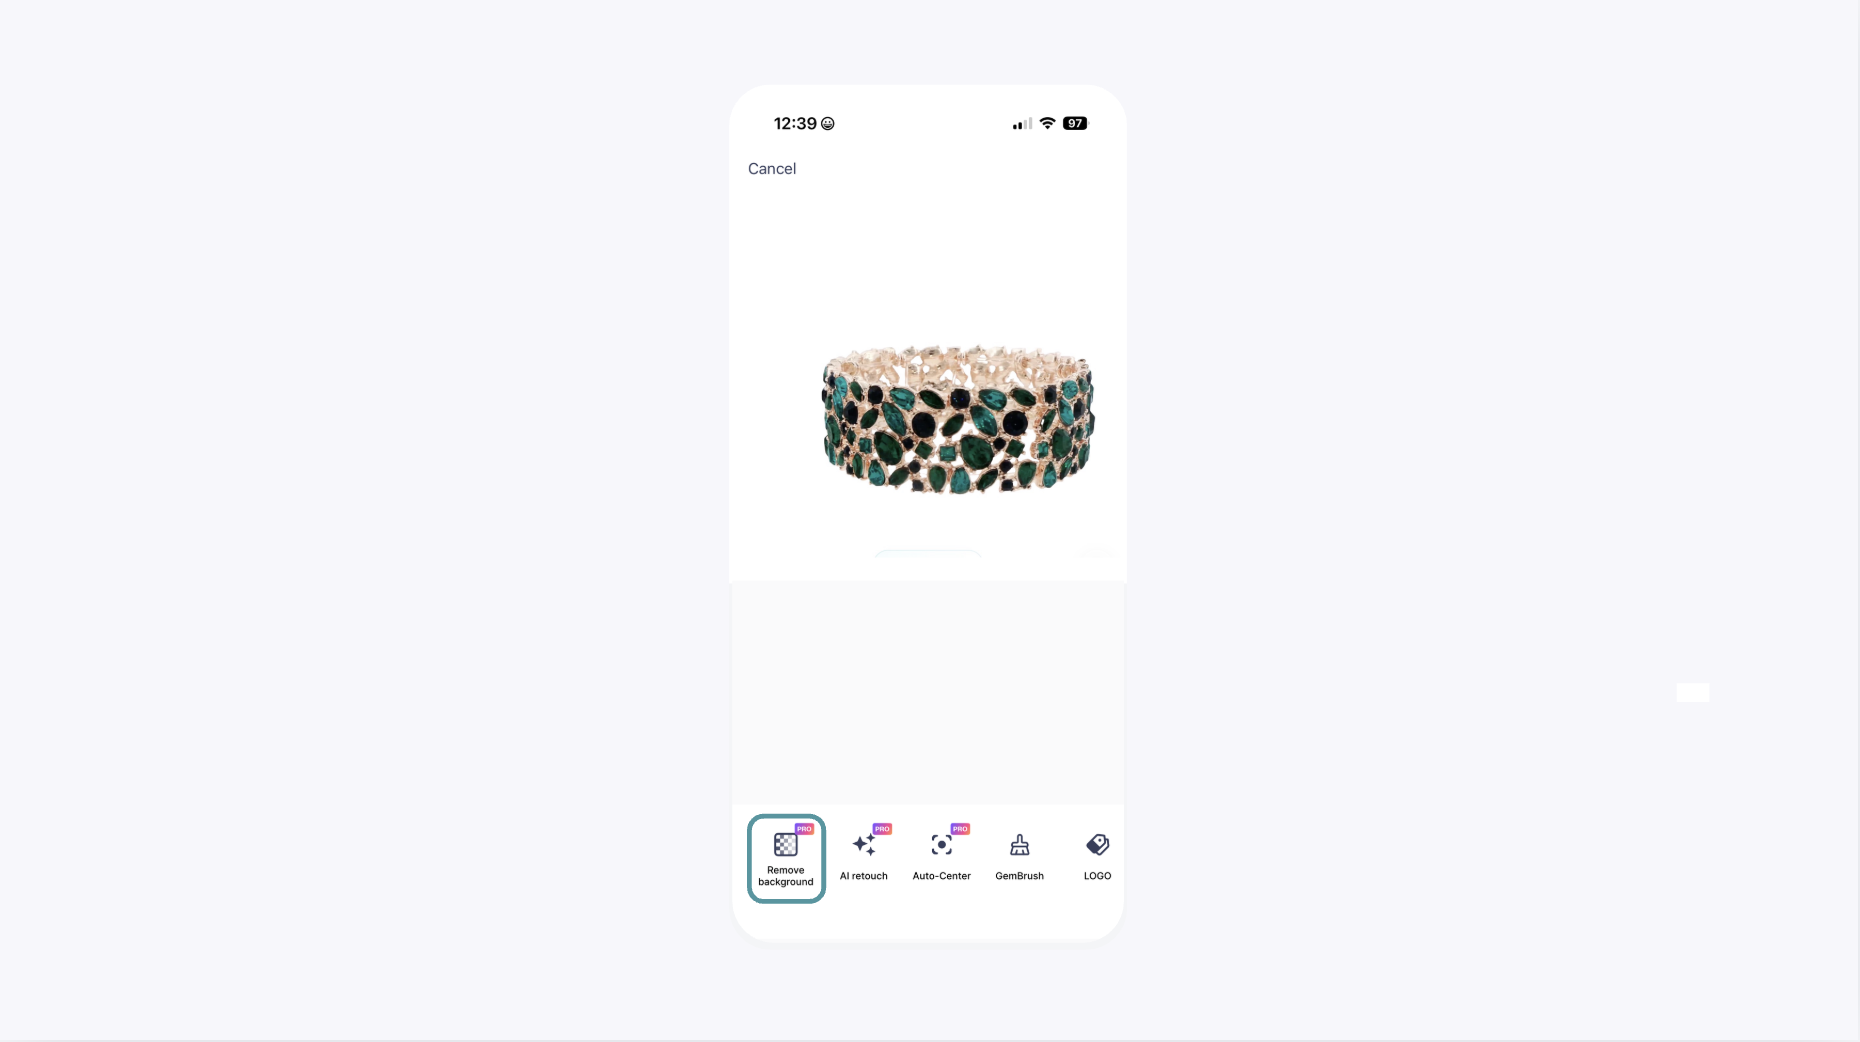
The AI will process the image and remove the background.
Choose a new background from the provided options or upload your own custom background.
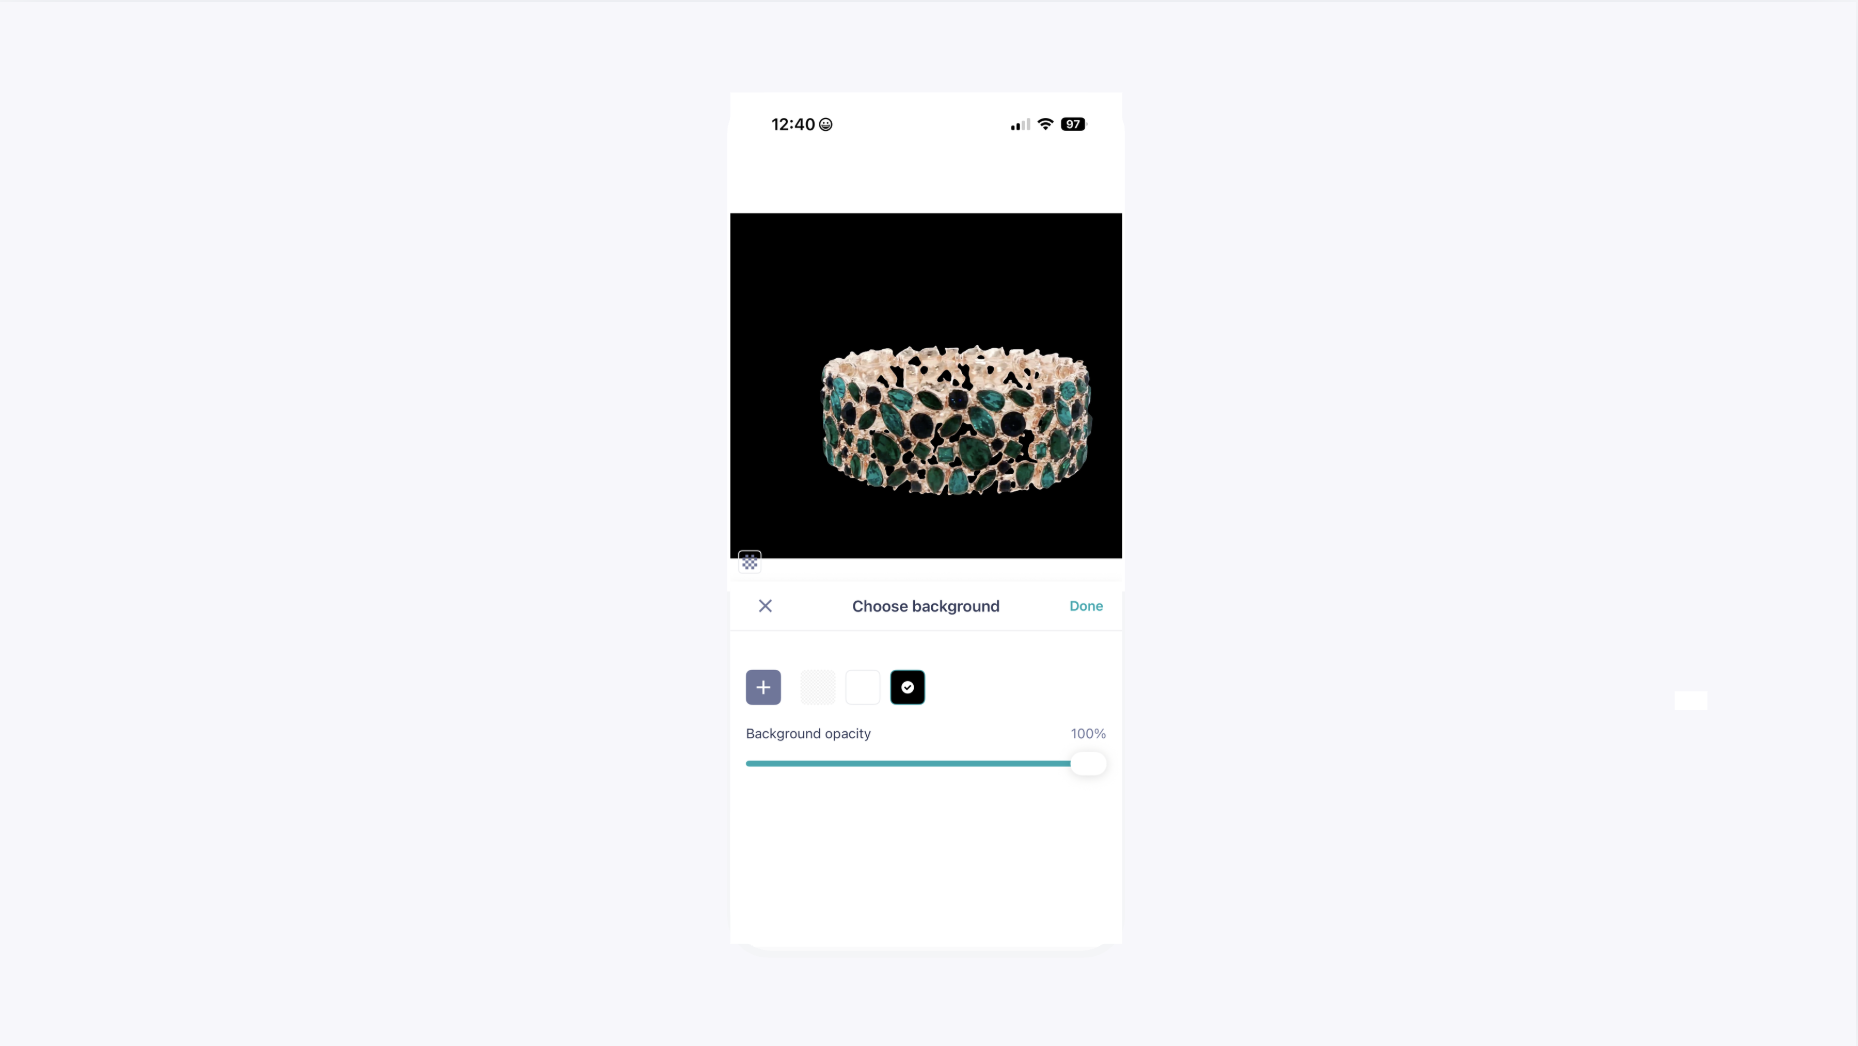
Once you are satisfied with the result, tap Save.
Expected Result#
The edited image with the new background will be saved to your GemIQ gallery. The original image will remain unchanged.
If This Does Not Work#
Check the original photo: The AI works best with high-quality, well-lit photos of a single item on a solid white background. If the background is cluttered or a different color, the tool may struggle to separate the subject.
Image format: This feature only works for still images (like JPG or PNG), not videos.
App version: Ensure your GemIQ application is updated to the latest version.
Common Mistakes#
Using complex backgrounds: Attempting to remove a busy or patterned background will produce poor results. Always shoot on a plain white background for this feature.
Editing photos with multiple items: The AI is trained to detect a single subject. Photos with multiple pieces of jewelry may not be processed correctly.
Using low-quality images: Blurry or poorly lit photos can make it difficult for the AI to find the edges of your jewelry, resulting in a messy cutout.